

Intro
One of the ways that you can make your cinemagraphs pop is by adding light trails to your cityscape cinemagraphs. However, the process isn’t exactly the same as making a basic cinemagraph. You have to use a bit of timelapse photography to get the look just right. When I started to get into cinemagraphs I immediately wanted to combine my love for cityscapes with the movement that I found in a cinemagraph. However, my first attempt didn’t turn out the way that I expected. It was because I used the same method for taking regular cinemagraphs which does not allow you to keep the shutter open in order to create the light trails.
Choosing a Subject
These is a difference between shooting something using the basic video-based cinemagraph and a timelapse style. The one that I am going to focus on here is the the fact that by using timelapse you get to keep your shutter open longer and can create stunning light trails in your cinemagraphs. Other uses could also include your usual timelaps subjects like weather patterns, crowds of people, etc. For this tutorial, we are going to keep it simple and work on creating light trails.
As I said before, my first attempt at shooting a rotary didn’t work out the way that I wanted. I soon realized that I needed to create an image stack or a groups of images taken at different times (timelapse) to get the desired effect. So I went out to find another area that I could get to easily, safely and I could spend a bit of time at. I am also a fan of rooftopping and I knew of a couple of places that overlooked some great intersections. When choosing a location, you want to find a clear view of the intersection or rotary. Make sure that there is a lot of traffic flow so that the you can maximize the about of light trials.

Shooting
Like any cinemagraph you are always going to need tripod to keep your shots steady. This is extremely important especially when shooting this type of cinemagraph. Another piece of equipment that is need is a intervalometer. This is a great tool to make sure that you are constantly shooting at the proper intervals. This is the main tool of timelapse photographers and it really helps. If you are not sure how to use or set up your intervalometer then you can check out this great series by the Canon Digital Learning Center.
Just like any timelapse you are going to want to shoot enough frames to capture a few seconds of movement. So you are looking at shooting about 24 photos for every second of footage that you want. You may not use all of the footage but you are better safe than sorry. Just like regular cinemagraphs, you are looking for a sweet spot for the movement. Thus having more footage is beneficial.
For light trails you are looking at keeping the shutter open long enough for the cars to streak a bit. This could be anywhere from 1 second to 15 seconds depending on the light or the effect that you are trying to achieve. I would recommend keeping the exposures on the short side just to make the light trails a little smoother.
For the intervals, it depends on how long your exposures are and the traffic. If you are at a busy intersection and there are lots of cars then I would suggest a shorter interval. If the light changes take forever and there are fewer cars then you can afford to stretch out your intervals to make the find image appear busier.
Editing in Lightroom
Editing your images is a little easier for this style than the basic cinemagraph if lightroom is a part of your regular workflow. Once you upload your photos into Lightroom, find the start of your timelapse images. Here you can experiment with the look and feel of your image. When you finally get the image to where you like it, select the rest of your images in that particular sequence.
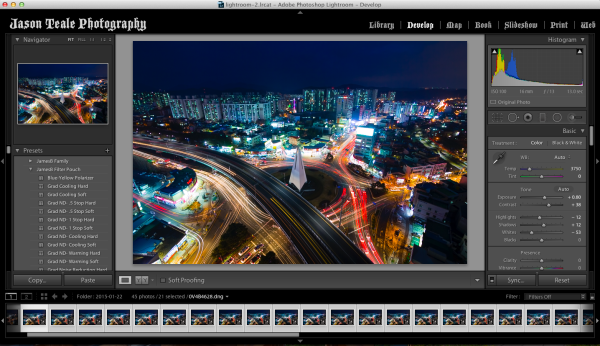
On the right side of your screen (both library and develop modes) you will see a button at the bottom that says “sync” Once you click on that, a dialogue box will come up and you should scan through to make sure all of the changes that you made to that first photo are checked off. Once you hit ok, then Lightroom will go ahead and apply the changes to the rest of the images that you selected. From here you can export them into a folder. I usually leave my images at full resolution just to make sure that they are the highest quality. Now, you are ready to start making your cinemagraph timelapse.
Assembling the Images in Flixel’s Cinemagraph Pro
When you start up cinemagraph pro, you can either go into the file menu and select “new from image sequence” or hit “option-command-n” Now, just navigate to the folder that you exported your images to and load them up. Just like before, cinemagraph pro will chose the first frame for you. Remember, that if you want to change the initial image or rather the still image, you can drag the purple tabs on the outside of the image sequence to find that sweet spot.
Trim
We are focussing on the repetition of the traffic for this particular shot, so you will want to play around with the length of the clip a bit. You are looking for a smooth flow and something that gives the illusion of an infinite loop. This may not always be possible but you have to work towards it the best that you can.

The clips for this type of cinemagraph do not have to be very long if the traffic that you focussed on is in a straight line for example. The repetitiveness of the scene does not demand for a long clip. However, if you are shooting a four-way intersection or rotary, you will want to use a clip long enough to get the complete transitions.
Mask
With traffic shots, I want to focus on the flow of the traffic. This makes it quite easy to mask. However, you want to make sure that there are not any distracting flickers or movements that could take away from the illusion. Be careful with sidewalks and pedestrians. If you are far enough away, then it shouldn’t matter but it could spell disaster if you have only masked out the street and people are crossing into nothing.

Once you get a rough idea of the parts that you want to move then check around the edges to make sure that everything looks good. Click on “overlay mask” to show the mask so that you can see if there are any areas that you might have missed.
Loop
This time you are just going to focus on the “repeat” mode as “bounce” would look really strange. Repeat is the default setting anyway, so just leave it where it is and then focus on the speed and cross-fade. For the speed, it all depend on what you want to show. Normally, a setting of 1.00 is fine but if you really want to show how crazy traffic can be, you can speed things up a bit. It is really up to you on this.

The cross-fade should be adjusted so that you don’t see the transition at all. When dealing with light trails, this is not too hard. Just drag out the green slider a bit and find the best spot. Try to time the transition to maintain the flow of traffic and cover up and ghosting that will result if there is a break in the traffic at the end of the clip. If this happens go back and trip the end up and test the cross-fade again.
Adjustments/Effects
Your photos at this point should already look great, so there is no real reason to play around in these modes too much. If you don’t quite have the look that you want or you’d like to add a bit more contrast then go ahead but I have found that the adjustments are a little heavy-handed, so subtle tweaks are recommended. The same thing goes for the effects mode.
Upload to Flixel Cloud

Now that you have your timelapse cinemagraph ready to go, upload it to the Flixel site. This is the best place to display and share your work. I have tried the options and really, this is the best. From the flixel site you can share to pretty much anywhere. If you have a blog like this, then all you have to do is copy the embed code and drop it into your post. It plays non-stop with the highest quality.


Recent comments